Are you seeing no service message on the top of your iPhone screen? The carrier signals won’t appear which indicates a loss of network. As you may decipher, when you see the no service error on your iPhone, you cannot place calls, send messages, or use the internet.
I have compiled some essential tips and tricks in this guide to help you fix the no-service error on your Apple iPhone. Before that, we need to understand what the no-service error means and what causes it.
Understanding the Meaning of No-Service Error on an iPhone
The no-service error means your iPhone is unable to use the telecom service provider whose SIM has been put into it. You cannot make phone calls or text messages from the iPhone.
Carrier signal bars will not be visible at the top of the iPhone screen, so you cannot call emergency services such as 911. The only way to make a call is to use the iPhone’s SOS feature.
Reasons for No-Service Error on iPhone
The common reasons why a no-service error may occur on your iPhone.
- A newly purchased SIM that is yet to be activated.
- Bugs in the iOS build running on the iPhone.
- You are in an area with no network coverage.
- Data Roaming has not been enabled.
- The SIM card validity has expired, or it has some physical damage.
1. Reboot the iPhone
Restart the iPhone by following the steps mentioned below and as per the iPhone model you have.
- For iPhone X/11/12/13/14, press and hold the volume down and the side button.
- For iPhone SE 2nd/3rd Gen/iPhone 7/8 series press and hold the side button.
- For the iPhone SE 1st Gen, 5s, and 5c, press the power button at the top of the phone.
You will be redirected to a screen that shows the option Slide to Power Off. Push the slider to turn the iPhone off.
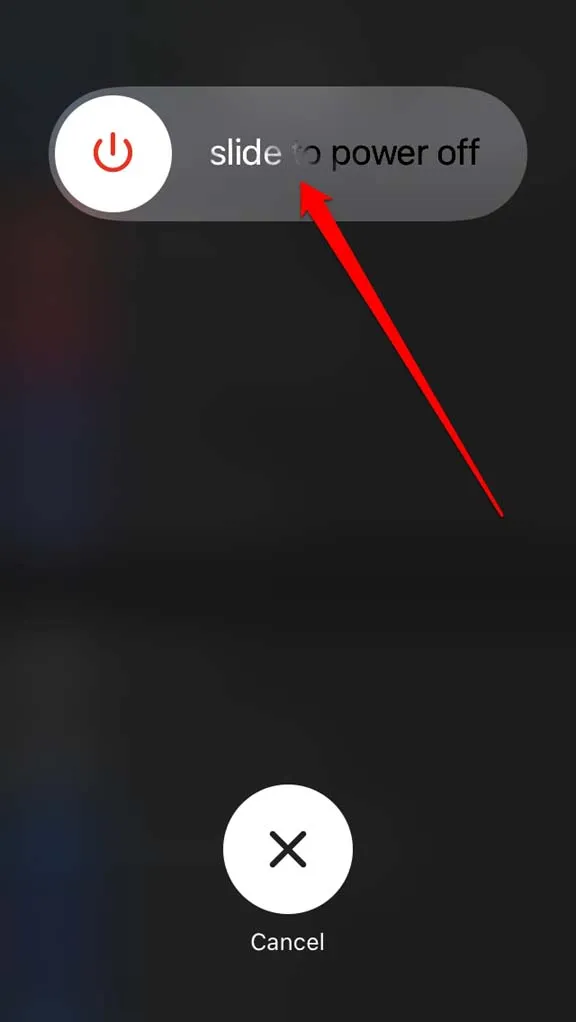
To restart press and hold the side button until the Apple logo appears. On an iPhone SE 1st gen, 5s, and 5c press the power button at the top to reboot.
2. Update the iOS
To get rid of the bugs on iOS, install a new iOS update. As you do not have access to the network on your device, connect to any WiFi and perform the update.
- Go to Settings > General > tap on Software Update.
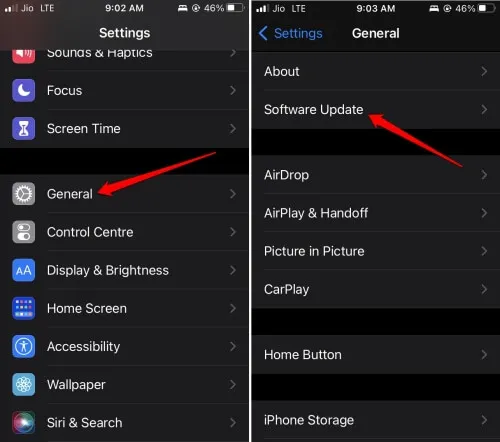
- Tap on Download and Install to start installing the iOS update.
- After the update is installed, restart the iPhone and check if the network has now been reinstated.
3. Be Present in an Area with Stable Network Coverage
If possible, try to move to an area with proper network coverage. If the region supports your ISP’s network, you can get the tele-carrier signals again. Then, you can easily make calls and send messages.
4. Eject and Re-insert SIM Card
Ensure that the SIM card has been properly placed within the SIM tray.
- For that, use the SIM ejector pin to take the SIM card out of the iPhone.
- Then clean the SIM card using a plain clean cloth.
- Put it on the SIM tray carefully.
- Next, insert it back into the SIM slot.
5. Contact your ISP Provider
You may also get in touch with your service provider to let them know of the issue. Sometimes it may be a collective network issue in the area. It could be an isolated network error with you.
Either way, the legitimate way to resolve this is to inform the ISP of the no-service error. They will either provide a solution or tell you to wait until they fix the network at their end.
6. Toggle Flight Mode on iPhone
Often for fixing network issues, toggling between flight modes is advised.
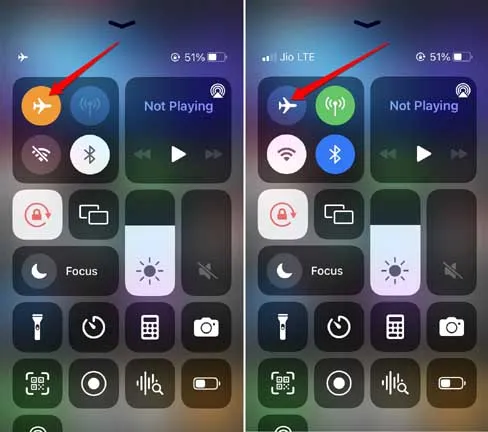
- Open the control center on iPhone.
- Tap the flight mode icon to enable it.
- After a second or two, tap the flight mode icon again to disable it.
7. Install Carrier Updates
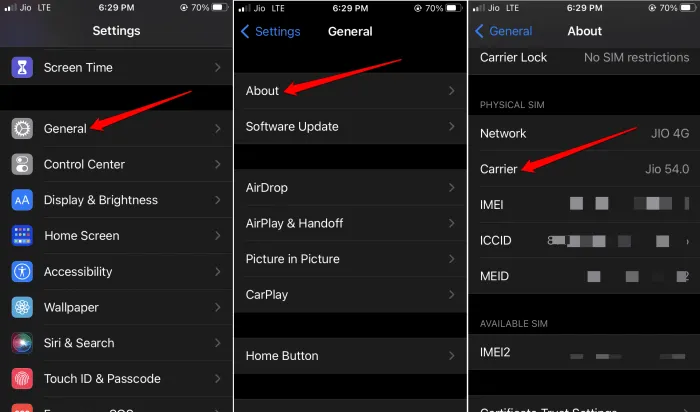
To install carrier updates,
- Open the Settings app > go to General > About > Carrier.
- Follow the instructions to install the pending carrier update.
8. Activate Data Roaming
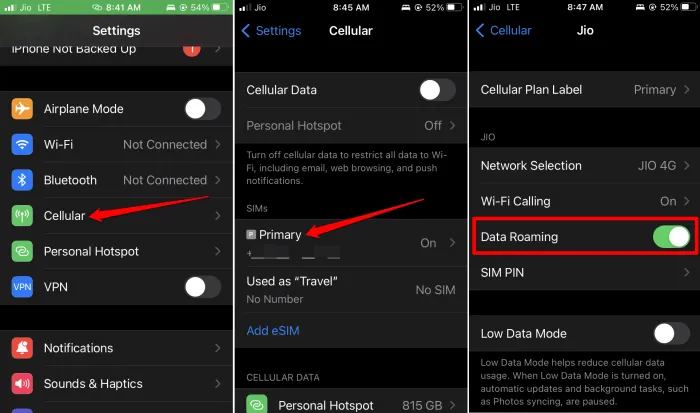
Enable data roaming when you are traveling. You will get the signal from the telecom network point of your corresponding provider in that location.
- Go to Settings > Cellular > tap on Primary under the tab SIMs.
- Tap the switch beside the option Data Roaming to enable it.
9. Re-enable Cellular Data
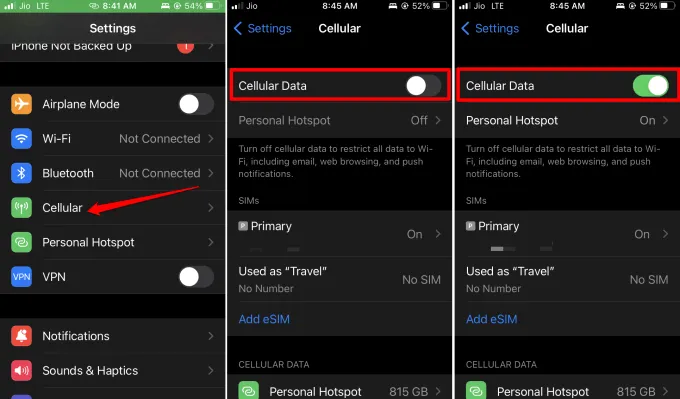
Disable the cellular data first and then re-enable it to see if it fixes the no-service error.
- Go to Settings > tap on Cellular.
- Tap the toggle beside Cellular Data to disable it.
- Wait for a few seconds and then tap the switch beside Celluar Data again to enable it.
10. Switch between Automatic and Manual Network Selection
Try changing between enabling the automatic network and the manual network. Check which of the two allows stable and better network connectivity.
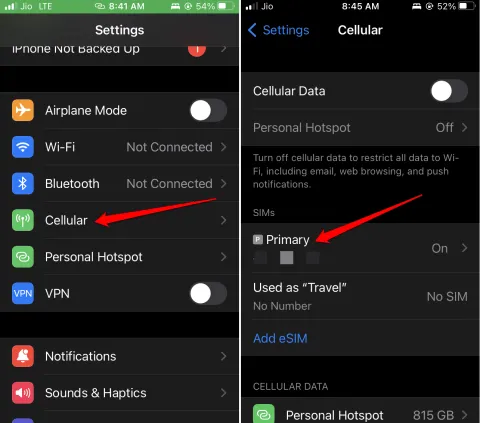
- Open Settings app > tap on Cellular Data
- Under that, tap on Primary > then tap on Network Selection.
- Tap the toggle beside Automatic to enable automatic network selection.
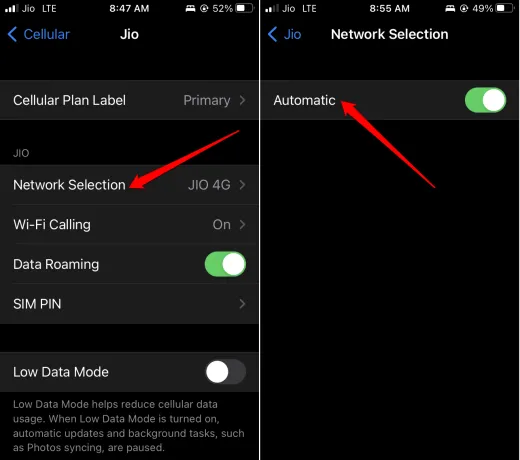
- If enabling the automatic network doesn’t fix the no-service error, tap the switch beside Automatic to disable it.
- Select from the list of available networks in the region manually.
11. Reset Network Settings
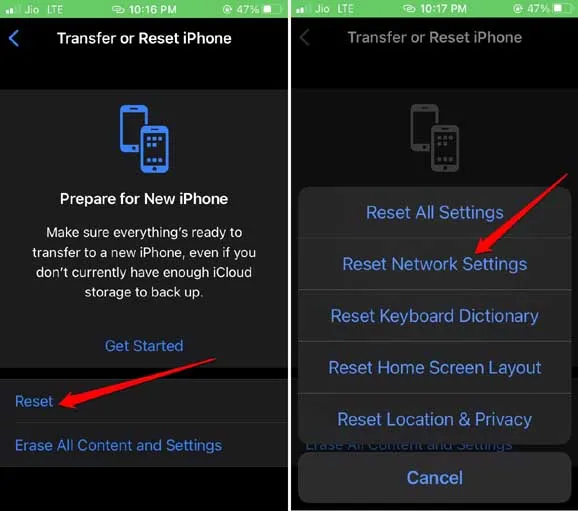
- Go to Settings > General > Tap on Transfer of Reset iPhone > Tap on Reset.
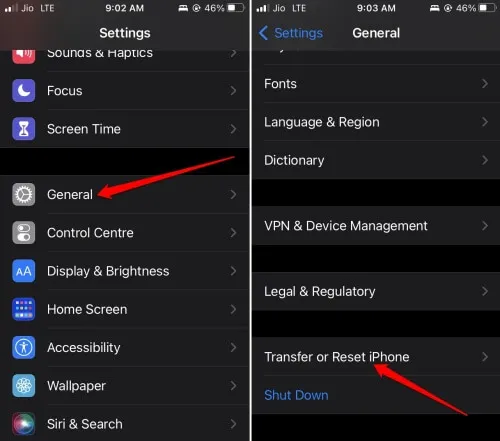
- Tap on Reset Network Settings and enter the iPhone passcode when prompted.
12. Always Use 4G or 5G Voice and Data
Use the latest standard of networks, such as 4G or 5G, to ensure better connectivity.
- Launch the Settings app > tap on Cellular.
- Next, tap on Cellular Data Options > tap in Voice & Data.
- Set the network to 4G or 5G.


Deixe um comentário